Table of Contents
- Admin Guide
- Installation
- Deploying SWIRL for Production Use
- Hardware Sizing
- Upgrading SWIRL
- Configuring SWIRL
- Search Expiration Service
- Search Subscriber Service
- Service Startup & Daemonization
- Manually Starting Services
- Managing Django Users
- Management Tools
- Database Migration
- Configuring Django
- Configuring Celery & Redis
- Security
- Troubleshooting
Admin Guide
Intended Audience
This guide is intended for developers and system administrators who want to harden/configure SWIRL for production use.
Installation
Configuring the SWIRL Environment
New in version 1.8, SWIRL uses django-environ to load important values such as hostname from a file called .env.
The file .env.dist contains expected defaults. If no .env file is created, then the install.sh script copy this file to .env prior to startup.
SECRET_KEY=your-secret-key
ALLOWED_HOSTS=localhost
PROTOCOL=http
SWIRL_EXPLAIN=True
SQL_ENGINE=django.db.backends.sqlite3
SQL_DATABASE=db.sqlite3
SQL_USER=user
SQL_PASSWORD=password
SQL_HOST=localhost
SQL_PORT=5432
MICROSOFT_CLIENT_ID=''
MICROSOFT_CLIENT_SECRET=''
MICROSOFT_REDIRECT_URI=''
OPENAI_API_KEY=
To configure a SWIRL server to listen on a particular port, hostname, via HTTPS, etc., modify the .env file and then restart SWIRL. There should never be a .env file in the SWIRL repo, and when updating SWIRL to a new version, no migration of these settings should be needed. They remain in .env.
The SWIRL_EXPLAIN item determines if SWIRL will show the explain structure or not.
The SECRET_KEY is actually a salt used by Django. SWIRL recommends generating a new one for production use.
Creating a SWIRL Super User
To start over with a new database, delete or rename the db.sqlite3 file. Then run this command:
python swirl.py setup
This will create a new, blank database. To create a Super User, run the following command:
python manage.py createsuperuser --email admin@example.com --username admin
Changing a Super User Password
If you already have an admin user, you can change the password with this command:
python manage.py changepassword admin
If you select a password that is too simple, Django will object. For more information see: django-admin and manage.py
Adding Normal Users
Use the Django Admin UI to add users:
http://localhost:8000/admin/
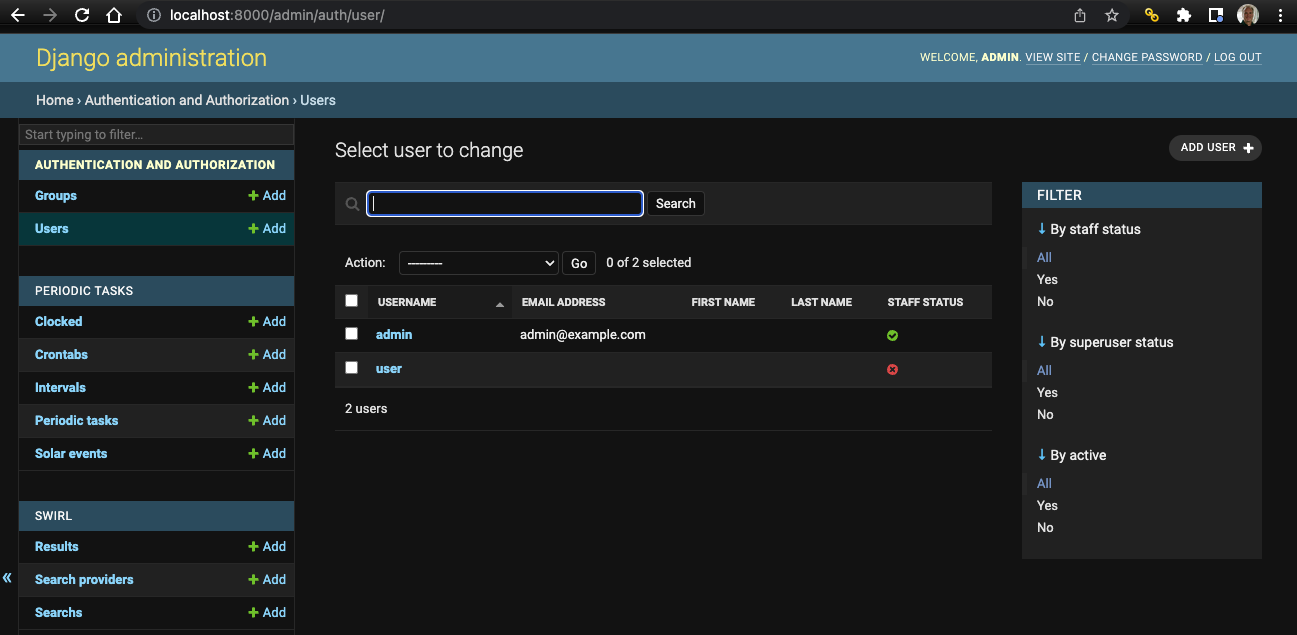
Permissioning Normal Users
There are four permissions – add, change, delete, and view – for each of the core SWIRL objects: SearchProviders, Search, Result, and Query Transform.
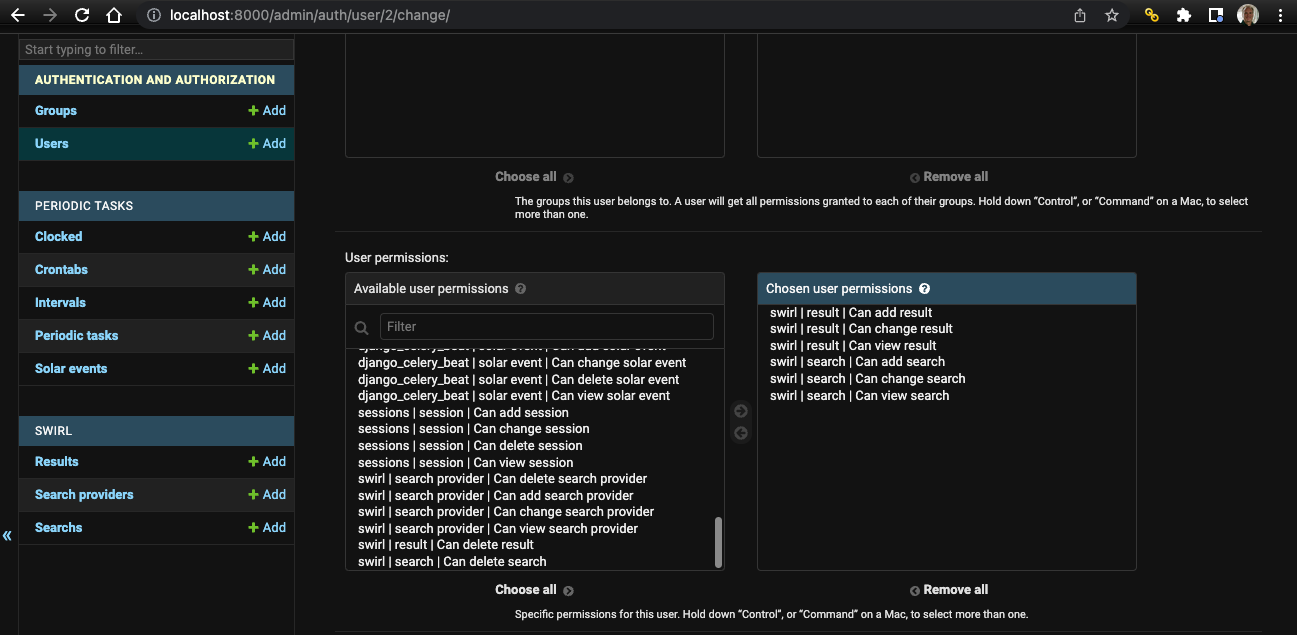
The following table shows how to configure these for various scenarios:
| Scenario | SearchProvider | Search | Results | Query Transform |
|---|---|---|---|---|
| Admin | ALL | ALL | ALL | ALL |
| Search ONLY | NONE | Add | ||
| Result ONLY | NONE | NONE | View | |
| Search & View Results | NONE | Add, View | Add, View | Add, View |
| Manage Search including re-run | NONE | ALL | ALL | ALL |
| SearchProvider Admin | ALL | Add | View | View |
Object Ownership
SearchProvider, Search, Result, and Query Transform objects are owned by, and private to, the Django user who creates them.
Shared SearchProviders and Query Transformations
SWIRL supports shared SearchProviders (v. 1.7) and Query Transformations (v. 2.0). These defaults to "false" for all Users, except the Django Super User (admin) which defaults to "true". This makes it easy to add users without having to duplicate SearchProviders or Query Transformations.
For installations with a large number of users, create groups with the desired permissions first, then assign each User to the appropriate group.
Deploying SWIRL for Production Use
The SWIRL application is designed to be deployed behind a reverse-proxy. There are many reasons for this:
-
Scalability: a reverse-proxy allows for the horizontal scaling of SWIRL. By deploying multiple SWIRL application VMs behind a reverse-proxy, the incoming connection demands can be handled by the reverse-proxy then disseminated to a pool of backend SWIRL servers. If demand for SWIRL increases, additional VMs can be provisioned on-demand. These VMs can also be turned down when the traffic drops below certain thresholds to save on hosting costs.
-
Security: Offloading the SSL/TLS overhead to a dedicated public endpoint such as a reverse-proxy alleviates the CPU load on the application server that serves up SWIRL.
-
Performance: Using a reverse-proxy separates the task of serving up static content from the application server. This makes it possible to deploy SWIRL with a content delivery network (CDN) which places static content close to the end user for a faster SWIRL experience.
-
Availability: a reverse-proxy adds resiliency to any setup by spreading traffic across a backend pool of SWIRL servers. The reverse-proxy monitors the pool of available backend servers and detects and removes failed servers from a pool of available ones.
Popular reverse-proxy projects/products include HA Proxy, Nginx, Azure Application Gateway and AWS Application Load Balancer.
Contact support to discuss this topic anytime.
Hardware Sizing
As of SWIRL 2.5, the federation process is CPU-bound. To maximize core utilization, allocate four (4) times the number of Celery workers.
SWIRL can be run continuously with minimal latency so long as:
(num_searches * num_searchproviders) <= num_cores
Contact support to discuss this topic anytime.
Upgrading SWIRL
Please contact support for instructions on upgrading Docker containers!
- Update the
swirl-searchrepository:git pull - Run the install script:
./install.sh - Setup SWIRL:
python swirl.py setup - Restart SWIRL core, if running:
python swirl.py restart core
Consult the release notes for more information on each release.
Configuring SWIRL
New in SWIRL 1.8: SWIRL_EXPLAIN is now configured as an environment variable.
SWIRL uses the following configuration items, defined in the swirl_server/settings.py:
| Configuration Item | Explanation | Example |
|---|---|---|
| CELERY_BEATS_SCHEDULE | Defines the schedule for the Search Expiration Service and Search Subscriber Service | See the linked sections. |
| SWIRL_DEFAULT_QUERY_LANGUAGE | Determines which stopword dictionary is loaded | SWIRL_DEFAULT_QUERY_LANGUAGE = 'english' |
| SWIRL_TIMEOUT | The number of seconds to wait until declaring federation complete, and terminating any connectors that haven't responded | SWIRL_TIMEOUT = 10 |
| SWIRL_SUBSCRIBE_WAIT | The number of seconds to wait before timing out and reporting an error when updating a search | SWIRL_SUBSCRIBE_WAIT = 20 |
| SWIRL_DEDUPE_FIELD | The field to use when detecting and removing duplicates with the DedupeByFieldPostResultProcessor | SWIRL_DEDUPE_FIELD = 'url' |
| SWIRL_DEDUPE_SIMILARITY_MINIMUM | The minimum similarity score that constitutes a duplicate, when detecting and removing duplicates with the DedupeBySimilarityPostResultProcessor | SWIRL_DEDUPE_SIMILARITY_MINIMUM = 0.95 |
| SWIRL_DEDUPE_SIMILARITY_FIELDS | A list of the fields to use when determining the similarity between documents when detecting and removing duplicates with the DedupeBySimilarityPostResultProcessor | SWIRL_DEDUPE_SIMILARITY_FIELDS = ['title', 'body'] |
| SWIRL_RELEVANCY_CONFIG | Defines the relevancy score weights for important fields | See below |
| SWIRL_MAX_MATCHES | Configures the maximum number of matches for any given result, before being cut-off. This helps protect against favoring very long articles. | SWIRL_MAX_MATCHES = 5 |
| SWIRL_MIN_SIMILARITY | Configures the minimum threshold at which a query hit in a result will be scored. Lower values will increase recall but lower precision. | SWIRL_MIN_SIMILARITY = 0.54 |
Example SWIRL_RELEVANCY_CONFIG
SWIRL_RELEVANCY_CONFIG = {
    'title': {
        'weight': 1.5
    },
    'body': {
        'weight': 1.0
    },
    'author': {
        'weight': 1.0
    }
}
Note that all configuration names must be UPPER_CASE per the django settings convention.
Search Expiration Service
The Expirer service can automatically delete Search and their associated (linked) Result objects after a specified period of time - to ensure SWIRL doesn't retain everything ever searched.
By default, this service runs every hour. The frequency is defined in the Django settings:
CELERY_BEAT_SCHEDULE = {
    # Executes every hour
    'expire': {
         'task': 'expirer',
         'schedule': crontab(minute=0,hour='*'),
        },
}
Temporary changes can also be made via the Django Console here:
http://localhost:8000/admin/django_celery_beat/crontabschedule/
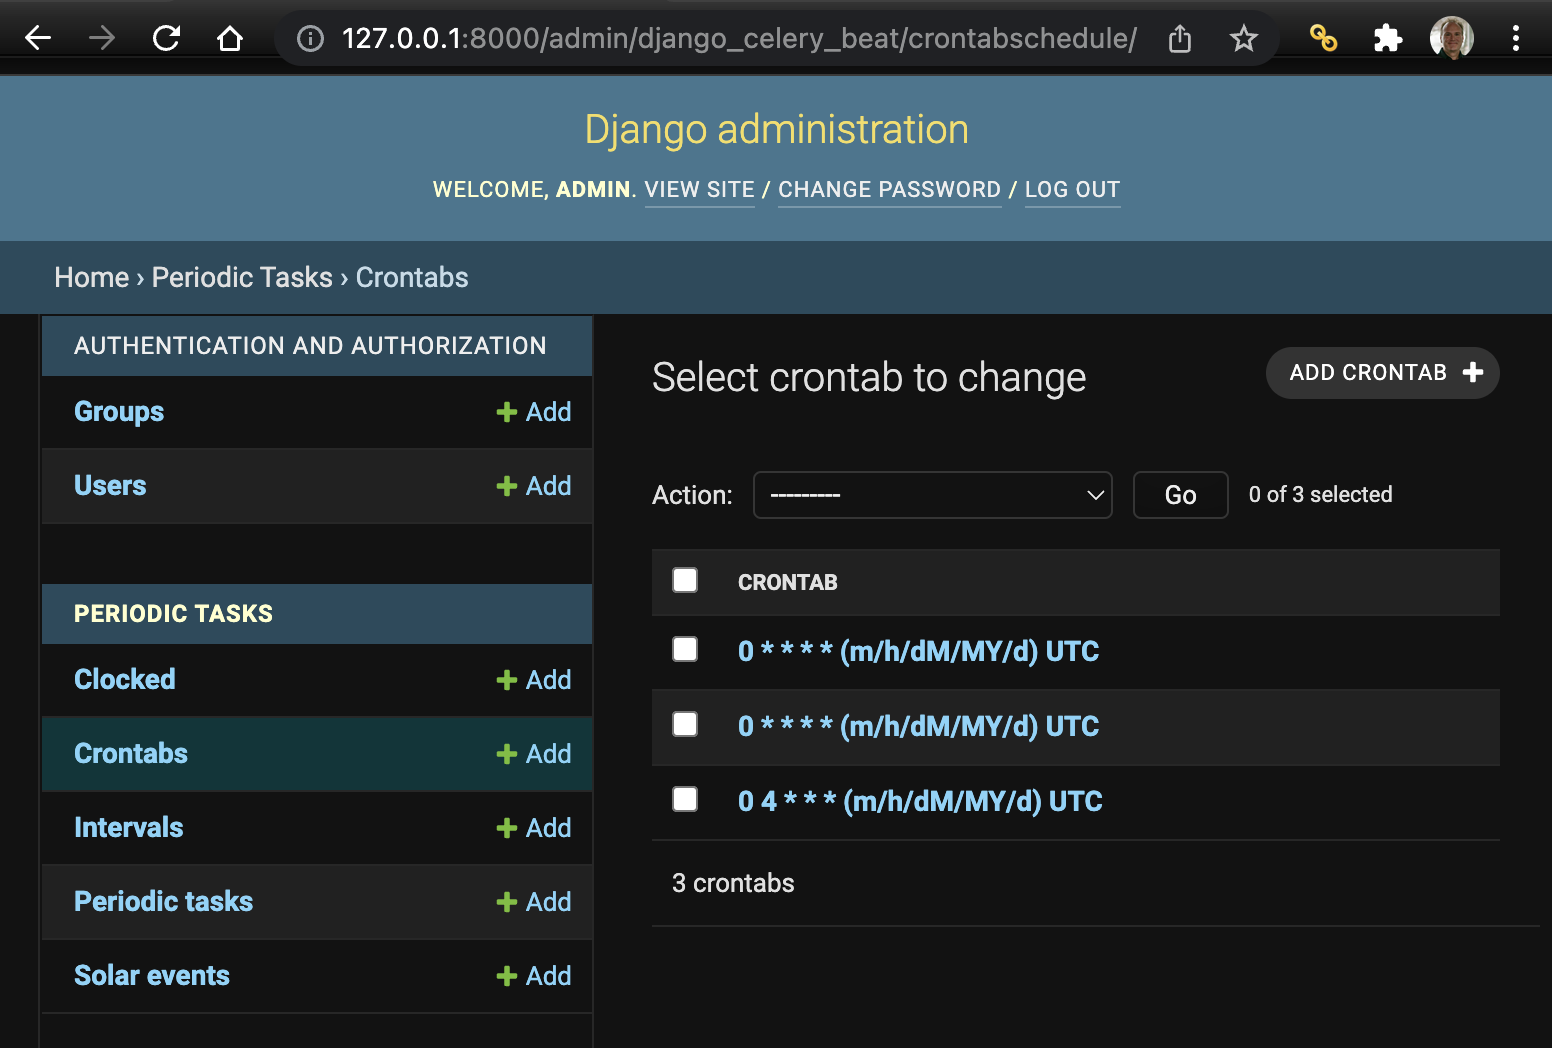
If you change the crontab entry in the database and don't change the CELERY_BEAT_SCHEDULE as well, that schedule will be restored if/when you restart SWIRL.
Search Subscriber Service
When one or more Search objects have the subscribe property set to True, SWIRL will periodically update that Search.
By default, the Subscriber service runs every four hours. The frequency is defined in the Django settings:
CELERY_BEAT_SCHEDULE = {
    # Executes every four hours
    'subscribe': {
         'task': 'subscriber',
         'schedule': crontab(minute=0,hour='*/4'),   # minute='*/10'
        },
}
Temporary changes can also be made via the Django Console here:
http://localhost:8000/admin/django_celery_beat/crontabschedule/
If you change the crontab entry in the database and don't change the CELERY_BEAT_SCHEDULE as well, that schedule will be restored if/when you restart SWIRL.
Service Startup & Daemonization
Using swirl.py
For normal operations, use swirl.py to start, stop or restart services. It is located in SWIRL's install directory (along with manage.py).
SWIRL's control scripts were updated in version 2.5!
- A
defaultkey was added to the services list, includingdebug, inswirl/services.py - The
celery-beatsservice was set todefault: False - swirl.py was modified to load only services with default: True
To use the subscribe or expiration features, celery-beats must be started (and stopped) separately:
python swirl.py start celery-beats
- To start services:
python swirl.py start
One or more services may be specified, e.g.:
python swirl.py start celery-beats
- To check the status of SWIRL:
python swirl.py status
SWIRL will report the current running services, and their pids:
__S_W_I_R_L__2_._6______________________________________________________________

Service: django...RUNNING, pid:1620
Service: celery-worker...RUNNING, pid:1625

  PID TTY           TIME CMD
 1620 ttys000    0:13.26 /Users/erikspears/.pyenv/versions/3.11.5/bin/python3.11 /Users/erikspears/.pyenv/versions/3.11.5/bin/daphne -b 0.0.0.0 -p 8000 swirl_server.asgi:application
 1625 ttys000    0:40.70 /Users/erikspears/.pyenv/versions/3.11.5/bin/python3.11 /Users/erikspears/.pyenv/versions/3.11.5/bin/celery -A swirl_server worker --loglevel INFO

Command successful!
- To terminate services:
python swirl.py stop
- To restart services:
python swirl.py restart
One or more services may be specified, e.g.:
python swirl.py restart celery-worker consumer
- To get help:
python swirl.py help
- To run in DEBUG mode:
python swirl.py --debug start
This will switch from running Daphne to the built-in Django webserver (runserver) and will set the logging level to DEBUG.
Customizing
The services invoked by swirl.py are defined in swirl/services.py. See the previous section for changes to the services definitions in version 2.5.
Troubleshooting
Note that swirl.py writes the list of services and their associated pids to a file: .swirl
Here is an example of a .swirl file for a fully running system:
{"redis": 26365, "django": 26391, "celery-worker": 26424}
This file is read by the status and stop commands. Both commands invoke ps -p with the pids for the services to determine if they are actually running and display this information for you.
If you start or stop individual services, the .swirl file should only have the names and pids for running services.
In the event that the .swirl file is out of sync with the running processes, you may delete it, or edit it to match the actual running processes. Be sure to manually delete any running processes. You can find them as follows:
On OS/X or Linux:
ps -ef | grep python
ps -ef | grep celery
ps -ef | grep redis
-
When troubleshooting
swirl.pybe sure to look atlogs/*.log. Live services will continue writing to the appropriately named logfile. -
If a service starts and then isn't running a short time later, check the log files as there is likely an exception occurring.
-
To change startup incantations, services names, or default value for any service, edit the
SWIRL_SERVICESvariable inswirl/services.py:
SWIRL_SERVICES = [
    {
        'name': 'redis',
        'path': 'retired : redis-server ./redis.conf',
        'default': False,
        'retired': True
    },
    {
        'name': 'django',
        'path': 'daphne -b 0.0.0.0 -p 8000 swirl_server.asgi:application',
        'default': True,
        'retired': False
    },
    {
        'name': 'celery-worker',
        'path': 'celery -A swirl_server worker --loglevel INFO',
        'default': True,
        'retired': False
    },
    {
        'name': 'celery-beats',
        'path': 'celery -A swirl_server beat --scheduler django_celery_beat.schedulers:DatabaseScheduler',
        'default': False,
        'retired': False
    }
]
Note that swirl.py starts the services in the order specified, but terminates the first service last - with a longer delay and using a group signal to shut down.
Manually Starting Services
The exact incantations to start the services varies by Operating System. The following sections present them along with the expected output.
Mac OS/X or Linux
Run each command shown below in a separate terminal window, in the directory where you installed SWIRL, e.g. swirl-search, in the order specified below.
Don't run these commands in the swirl_server subdirectory! They won't work there. If you aren't sure, check that manage.py is present in your current directory.
As of Release 2.6, SWIRL's start-up process no longer starts redis. You must now have redis installed and running before starting SWIRL.
- Setup Django
cd swirl-search python manage.py makemigrations python manage.py makemigrations swirl python manage.py migrate python manage.py collectstatic - Start Django Server
cd swirl-search
daphne swirl_server.asgi:application
When Django is running the front page should load…
- Start Celery Worker
cd swirl-search celery -A swirl_server worker --loglevel=info - Start Celery Beats This is only required if using the Search Expiration Service or the Search Subscription Service.
celery -A swirl_server beat -l INFO --scheduler django_celery_beat.schedulers:DatabaseScheduler
Managing Django Users
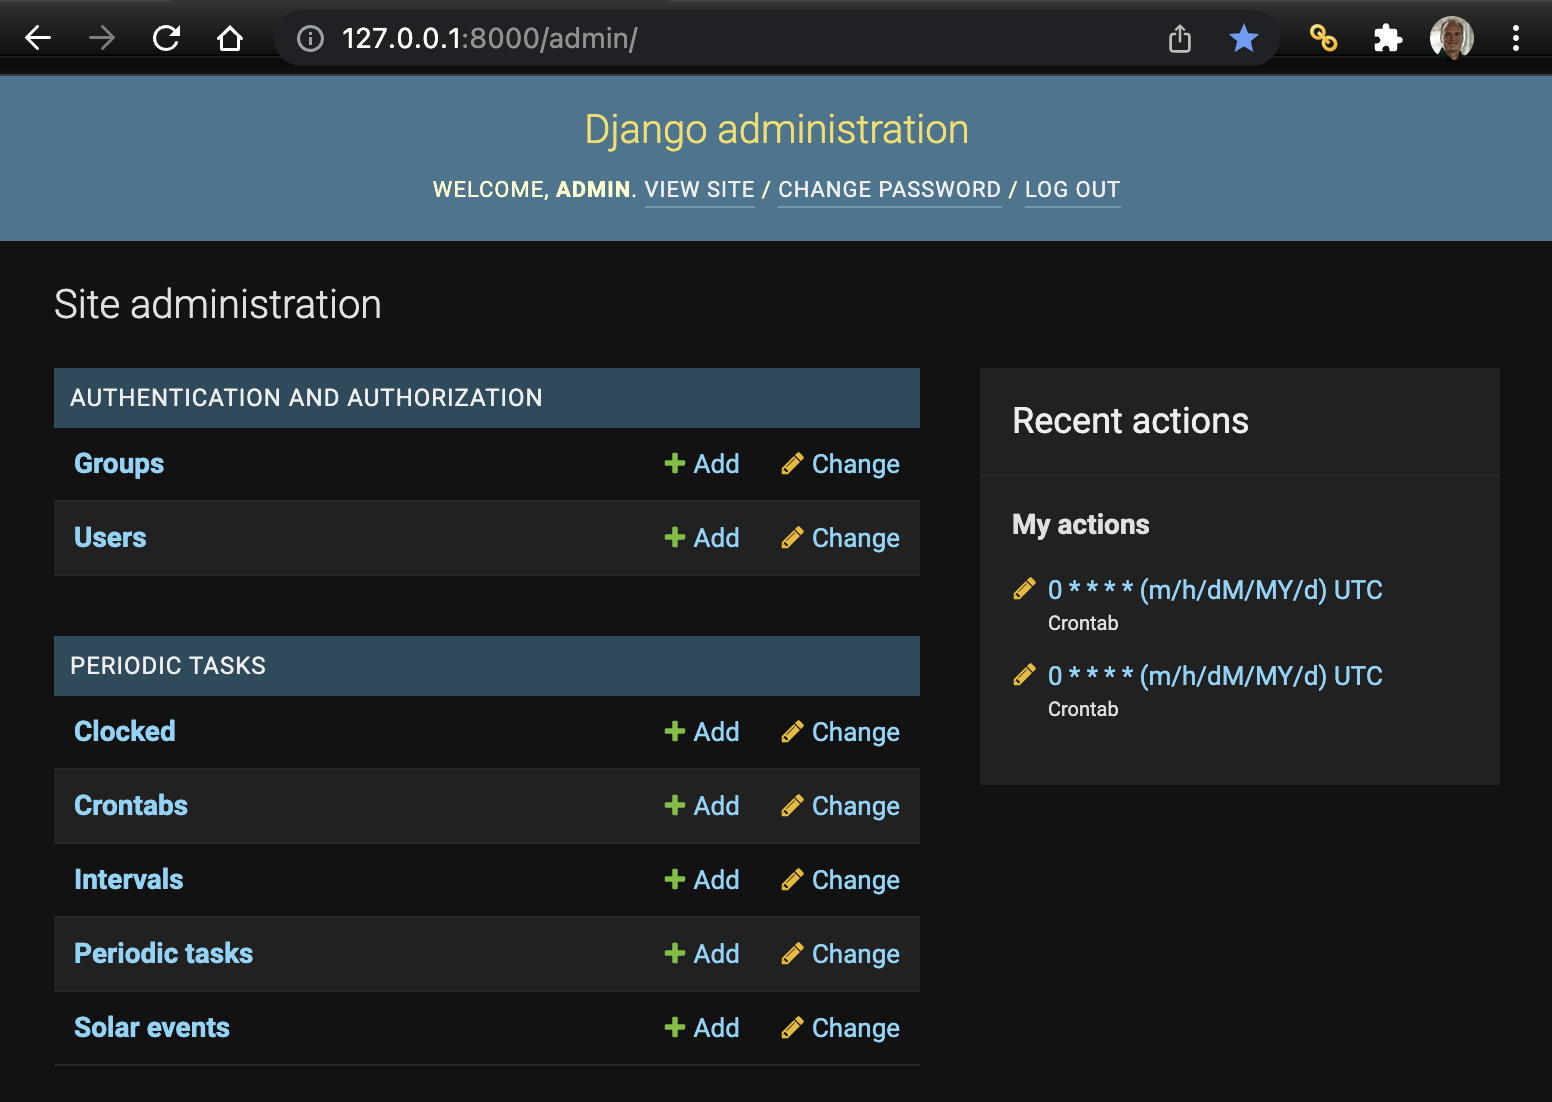
Django Admin
Most users can be managed through the Django Admin, which is located here:
http://localhost:8000/admin/
To Change a User's Password
python manage.py changepassword <user_name>
Management Tools
Django Console
Django has a built-in web UI for managing users, groups, crontabs, and more.
The URL is: http://localhost:8000/admin/
Django dbshell
Django has a built-in shell for managing the database. You can run it in the swirl-search directory as follows:
./manage.py dbshell
Wiping the Database
python manage.py flush
All SWIRL objects will be deleted, once you confirm.
You must create a new SWIRL Super User after doing this.
sqlite-web
The open source sqlite-web project offers a solid web GUI!
pip install sqlite-web
sqlite_web my_database.db                   # makes it run locally http://localhost:8080/
sqlite_web --host 0.0.0.0 my_database.db    # run it on the lan
Don't forget to give it the path to db.sqlite3 in swirl-search when you invoke it.
Database Migration
If you change most anything in swirl/models.py, you will have to perform a database migration. Detailing this process is beyond the scope of this document. For the most part, all you have to do is:
python swirl.py migrate
For more information: https://docs.djangoproject.com/en/4.0/topics/migrations/
- Migration is usually simple/easy if you are just adding fields or changing defaults
- It's a good idea to delete existing data before doing anything drastic like changing the name of an
idor relationship - usesqlite-web(see above)! - If things go wrong:
- Delete
db.sqlite3 - Delete all
swirl/migrations/ - Run:
python manage.py flush - Then, repeat this process
- Delete
Don't forget to create a SWIRL Super User after flushing the database!
Configuring Django
There are many values you can configure in swirl_server/settings.py.
These include:
- Hostname
- Protocol
# PUT the FQDN first in the list below
ALLOWED_HOSTS = ['localhost']
HOSTNAME = ALLOWED_HOSTS[0]
PROTOCOL = 'http'
The FQDN that SWIRL should listen on must be the first entry in the ALLOWED_HOST list.
- Time Zone
TIME_ZONE = 'US/Eastern'
...
CELERY_TIMEZONE = "US/Eastern"
CELERY_TIME_ZONE = "US/Eastern"
- Celery Beats
The configuration for Celery-Beats is also here, in case you are using the Search Expiration Service or the Search Subscription Service:
CELERY_BEAT_SCHEDULE = {
    # Executes every hour
    'expire': {
         'task': 'expirer',
         'schedule': crontab(minute=0,hour='*'),
        },
}
- Database Provider
DATABASES = {
    "default": {
        "ENGINE": os.environ.get("SQL_ENGINE", "django.db.backends.sqlite3"),
        "NAME": os.environ.get("SQL_DATABASE", BASE_DIR / "db.sqlite3"),
        "USER": os.environ.get("SQL_USER", "user"),
        "PASSWORD": os.environ.get("SQL_PASSWORD", "password"),
        "HOST": os.environ.get("SQL_HOST", "localhost"),
        "PORT": os.environ.get("SQL_PORT", "5432"),
    }
}
To configure PostgreSQL as the Django back-end:
- Install PostgreSQL (if not already installed)
- Ensure that
pg_configfrom the PostgreSQL distribution is in thePATHand runs from the command line - Install the
psycopg2driver:pip install psycopg2Then follow the appropriate section of Configuring Django Database Back-Ends.
- Uncomment the PostgreSQL Connector in the following modules:
swirl.connectors.__init__.py# uncomment this to enable PostgreSQL # from swirl.connectors.postgresql import PostgreSQLswirl.models.pyCONNECTOR_CHOICES = [ ('ChatGPT', 'ChatGPT Query String'), ('RequestsGet', 'HTTP/GET returning JSON'), ('RequestsPost', 'HTTP/POST returning JSON'), ('Elastic', 'Elasticsearch Query String'), ('OpenSearch', 'OpenSearch Query String'), # Uncomment the line below to enable PostgreSQL # ('PostgreSQL', 'PostgreSQL'), ('BigQuery', 'Google BigQuery'), ('Sqlite3', 'Sqlite3'), ('M365OutlookMessages', 'M365 Outlook Messages'), ('M365OneDrive', 'M365 One Drive'), ('M365OutlookCalendar', 'M365 Outlook Calendar'), ('M365SharePointSites', 'M365 SharePoint Sites'), ('MicrosoftTeams', 'Microsoft Teams'), ]
Configuring Celery & Redis
Celery is used to execute a SWIRL federated search. It uses Redis as a result back-end for asynchronous operation. Both of these systems must be configured correctly.
Celery is configured in at least three locations. They must be the same!
swirl_server/celery.pyapp = Celery('swirl_server', broker='redis://localhost:6379/0', backend='redis://localhost:6379/0')If this is setup correctly, you should see the backend setting appear when you run Celery from the command line:
> transport: amqp://guest:**@localhost:6379// - ** ---------- .> results: rpc://swirl_server/settings.py(Django settings):
# Celery Configuration Options
CELERY_TIMEZONE = 'US/Eastern'
CELERY_TIME_ZONE = 'US/Eastern'
CELERY_TASK_TRACK_STARTED = True
CELERY_TASK_TIME_LIMIT = 30 * 60
CELERY_BEAT_SCHEDULE = {
    # Executes every hour
    'expire': {
         'task': 'expirer',
         'schedule': crontab(minute=0,hour='*'),
        },
    # Executes every four hours
    'subscribe': {
         'task': 'subscriber',
         'schedule': crontab(minute=0,hour='*/4'),   # minute='*/10'
        },
}
CELERY_BROKER_URL = 'redis://localhost:6379/0'
# CELERY_BROKER_URL = 'amqp://guest:guest@localhost:6379//'

CELERY_RESULT_BACKEND = 'redis://localhost:6379/0'
# CELERY_RESULT_BACKEND='rpc://'
The settings.py file also contains the configuration for the Search Expiration Service and the Search Subscription Service.
Security
The Django Secret Key
In swirl_server/settings.py, there is a configuration item for a SECRET_KEY. This is not really a big deal. If you change it, active users will have to login again. That's it.
To change the one that is in the repo:
python -c "import secrets; print(secrets.token_urlsafe())"
SWIRL User & Group Support
You can use Django's built-in authentication support, which adds User and Group objects, or implement your own. The following sections detail how to access these.
| URL | Explanation |
|---|---|
| /swirl/users/ | List User objects; create a new one using the form at bottom |
| /swirl/users/id/ | Retrieve a User object; destroy it using the Delete button; edit it using the form at bottom |
| URL | Explanation |
|---|---|
| /swirl/groups/ | List Group objects; create a new one using the form at bottom |
| /swirl/groups/id/ | Retrieve a Group object; destroy it using the Delete button; edit it using the form at bottom |
You can also edit these tables using the Django Console:
For more information, see: User authentication in Django
Troubleshooting
Log Information
All SWIRL services write log files in the logs/ folder under swirl-search.
Here's what to expect in each:
| Logfile | Details | Notes |
|---|---|---|
| logs/redis.log | Contains infrastructure issues for the in-memory data store | Not involved in federation |
| logs/django.log | Contains the log of the Django container, which includes all HTTP activity API calls. | Not involved in federation |
| logs/celery-worker.log | Contains the log of Celery tasks | Very involved in federation, look for detailed information regarding errors in search.status or partial results |
| logs/celery-beats.log | Contains the log of the celery-beats service, which is only used by the Search Expiration and Subscription Services | Look here for issues with subscription or expiration not working |
From the SWIRL root directory, try running:
python swirl.py logs/
This will show you the collected, latest output of all logs, continuously.
As of version 2.5, SWIRL now outputs a single log entry with each request at the default log level INFO:
2023-08-02 10:49:09,466 INFO admin search 452 FULL_RESULTS_READY 32 2.2
Detailed logging is available in Debug mode: restart SWIRL with the --debug flag to enable (or edit the settings.py file as outlined below).
Debug Mode
By default, SWIRL ships in production mode. To put Django into DEBUG mode, modify swirl_server/settings.py, changing:
DEBUG = False
…to…
DEBUG = True
Then restart Django. Debug mode provides far more debugging information.
You can also configure the logger invoked at the top of each module. For example, to turn logging up to DEBUG, add the following incantation after the line 'import logging as logger':
logger.basicConfig(level=logging.DEBUG)
For more information about logging, see: https://docs.python.org/3/howto/logging.html